
Software
meshO Manager's new menu, header and dashboard
This release of meshO Manager changes the frame around every event page: a menu in three modes with a Go to search, the event's details in the top bar, one state button in place of the row of Start, Finish and Close buttons, and a dashboard with more room for its tiles. Nothing has been taken away. Here is what moved and where to find it.

Tate Needham
meshO · · 6 min read
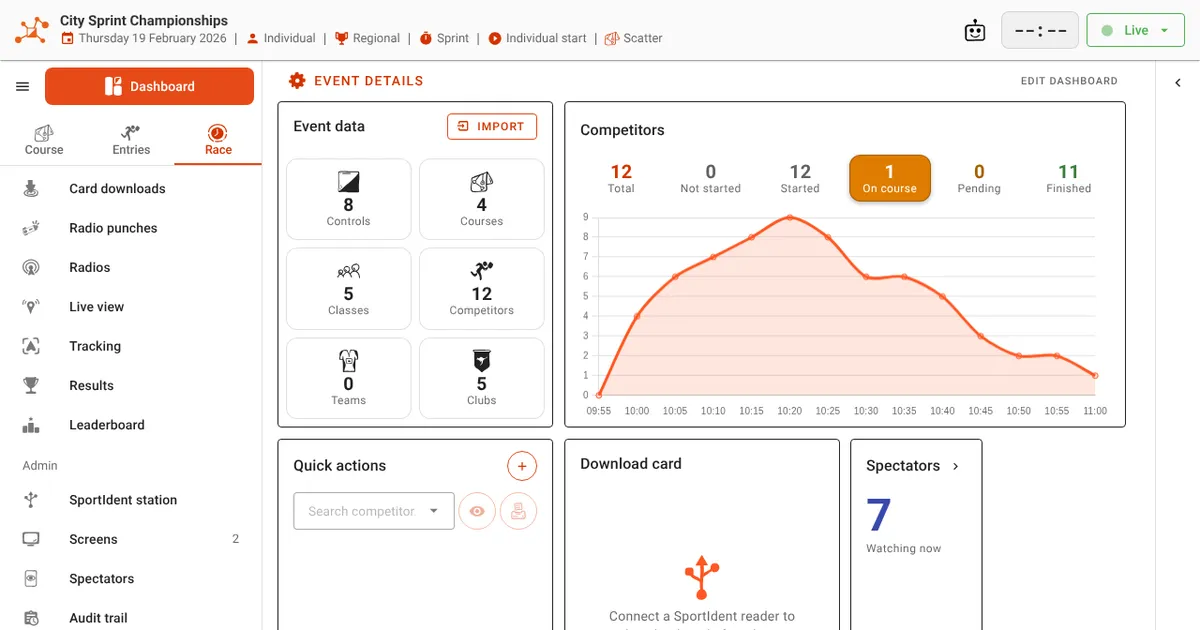
The latest release of meshO Manager looks different the moment you open an event. The menu down the left, the bar across the top, the buttons that start and finish an event, and the top of the dashboard have all been redesigned.
This article is for people who already run events with Manager. It goes through each change with the old screen beside the new one, so you know where everything went before your next event. Your events, settings and screens are untouched: every screen you used is still there, and how an event runs on the day is the same.
The short version: the event’s state is now a button at the top right, and Start event, Finish event and Close are in its menu. The menu shows one of three modes, Course, Entries or Race, and Ctrl+K finds any screen by name.
Why we changed it
The old layout grew one screen at a time, and the menu ended up sorted by the kind of data each screen held rather than by what you were doing with it. What operators have told us, and what we see when we run events ourselves, pointed the same way.
- It follows how an event is run. You set up courses, then take entries, then run the race. The menu’s three modes, Course, Entries and Race, follow that order, and the menu moves to Race by itself when the event starts.
- It is easier to find things. Each screen now has one place, in a mode named for the job it belongs to. The race screens no longer stay hidden until the start, and Go to… finds any screen or setting by name, including the sections of Event details that were never in the menu.
- It is more approachable for new users. Someone opening Manager for the first time sees a handful of screens, not twenty, and the state button says what the event is doing and what to do next. On an event being set up it opens by itself to show where Start event is.
- It works better on smaller screens. The old menu ran off the bottom of a laptop screen and the dashboard’s header took space from its tiles. Now the menu is shorter, folds to icons on a narrow window, and the event’s details share the top bar.
The dashboard at a glance
Drag the handle across the screenshot below to compare the old dashboard with the new one. Both show the same live event.
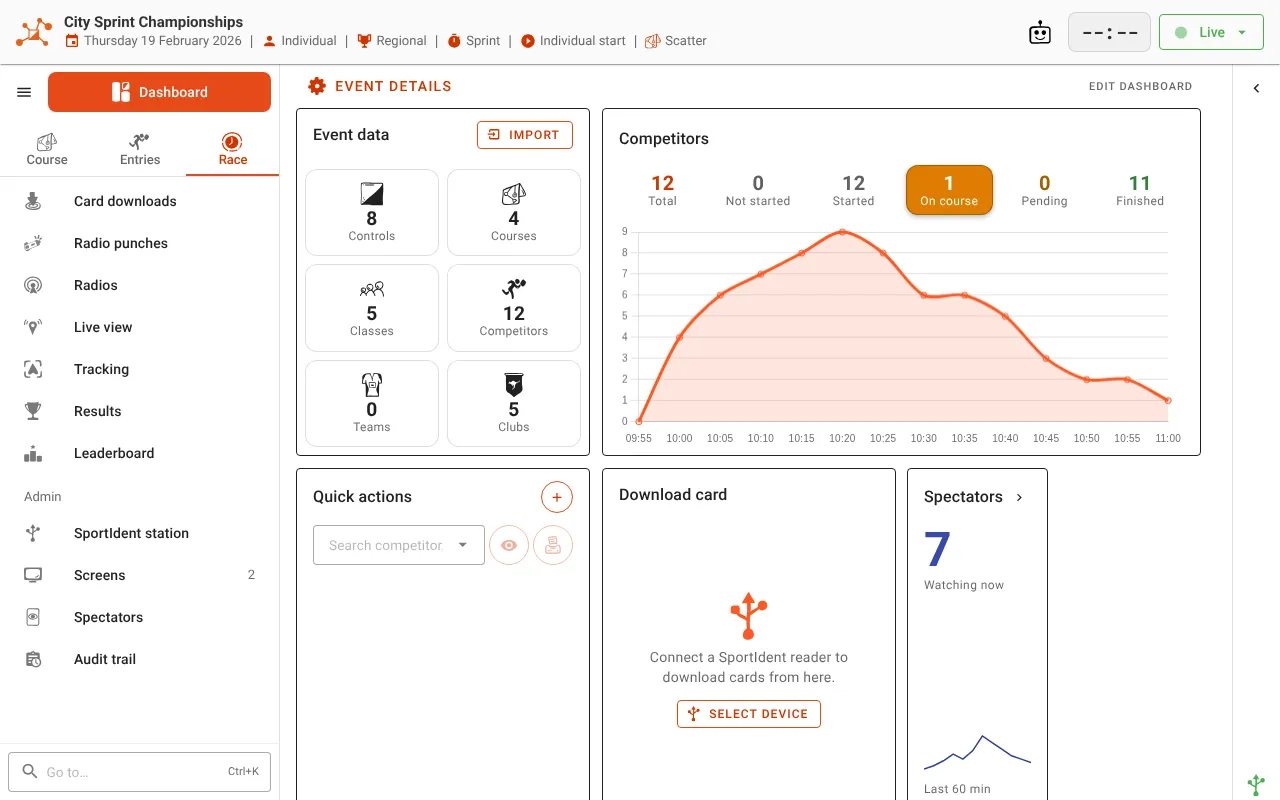
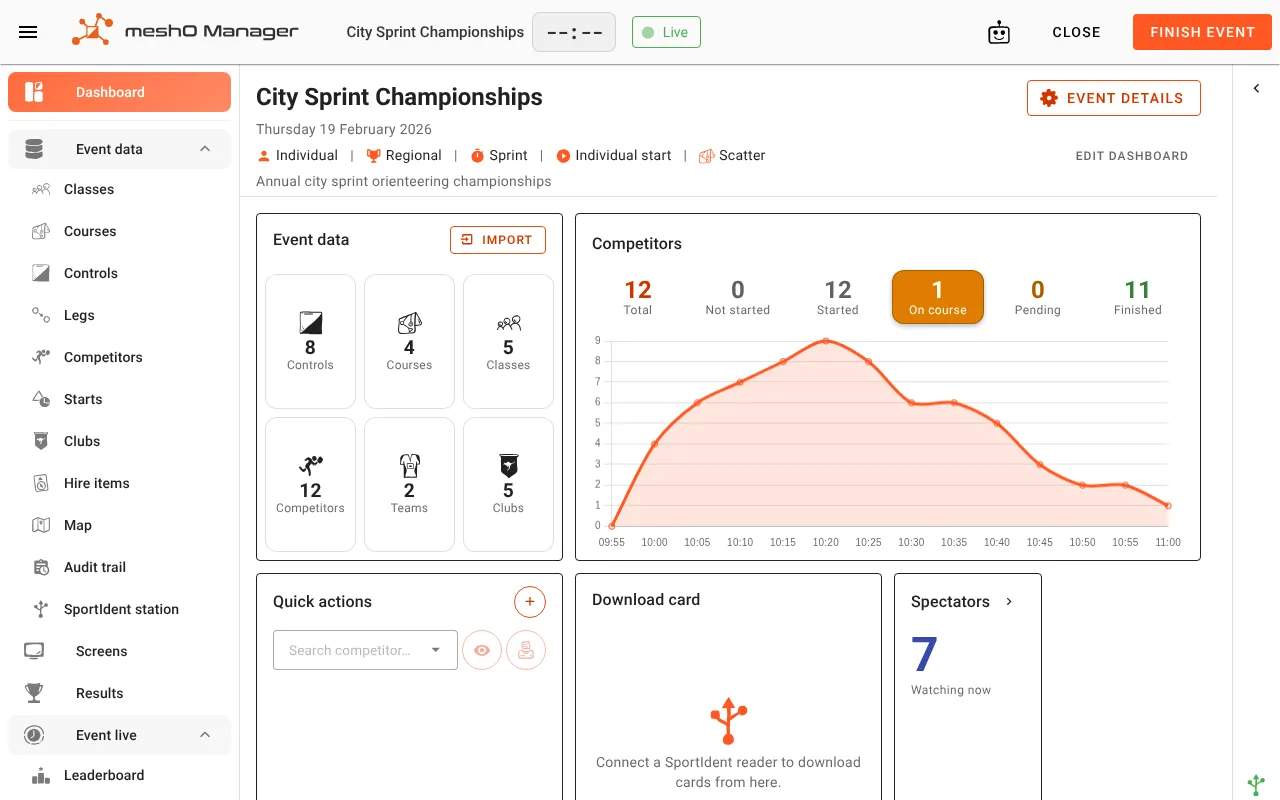
Three things changed on the dashboard itself:
- The header is gone. The event’s name, date, type, level, discipline and start type used to fill a block at the top of the dashboard. They are now in the top bar, on every page of the event (next section).
- Event details and Edit dashboard share one line. Event details is on the left and opens the same Event details dialog as before. Edit dashboard is on the right, smaller, for rearranging the tiles.
- The tiles have more room. With the header gone, the tiles start higher, so more of the Competitors chart and the Quick actions list fits on a laptop screen.
The top bar names the event
The bar across the top used to show the meshO Manager logo and the event’s name in small type. It now shows the meshO logo on its own, the event’s name in bold, and on the line below it the full date and the event’s facts: individual, relay or team, the level, the discipline, the start type, and Eventor if the event was imported from Eventor.


The menu button that used to sit at the far left of the bar has moved into the menu itself, beside Dashboard. The Ask button and the event clock stay on the right, and the clock now sits between Ask and the state button.
One state button in place of a row of buttons
The old bar had a status chip and, beside it, a row of buttons that changed with the event: Start event and Close while you set it up, Finish event and Close while it ran, Resume, Replay or Restart event at other times.
Those are now one button. It names the event’s state, Setup, Live, Testing, Interrupted or Complete, in the same colour the chip used. Click it and its menu says what the state means, offers the one thing to do next as a large button, and lists everything else below.


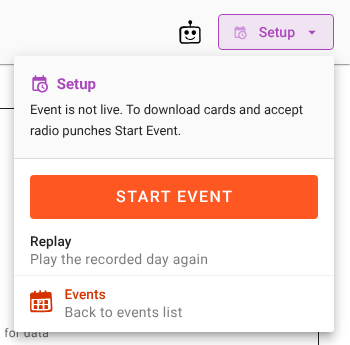
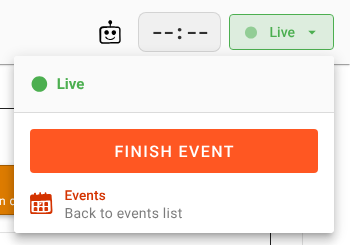
Start event is now inside the menu. So that it is not missed, the menu opens by itself for five seconds when you arrive at an event that is being set up. Move the pointer into it and it stays open. On a live, finished or interrupted event it waits to be clicked.
Close is now Events. The last item of the menu, in every state, is Events (Back to events list). It does the same as the old Close button: it takes you back to the event list and leaves the event as it was. A live event stays live.
What the menu offers in each state:
| State | The large button | Also in the menu |
|---|---|---|
| Setup | Start event | Replay, if the event has recorded data; Events |
| Live | Finish event | Events |
| Testing | Finish test | Events |
| Interrupted or Abandoned | Resume event | Mark finished; Replay; Events |
| Complete | none | Replay; Restart event; Events |
Restart event is how you take a finished event live again, for example for a competitor who comes out of the forest after you finished it. It works the same as before. It is now in the Complete menu, shown quietly, rather than as a button in the bar.
The menu has three modes
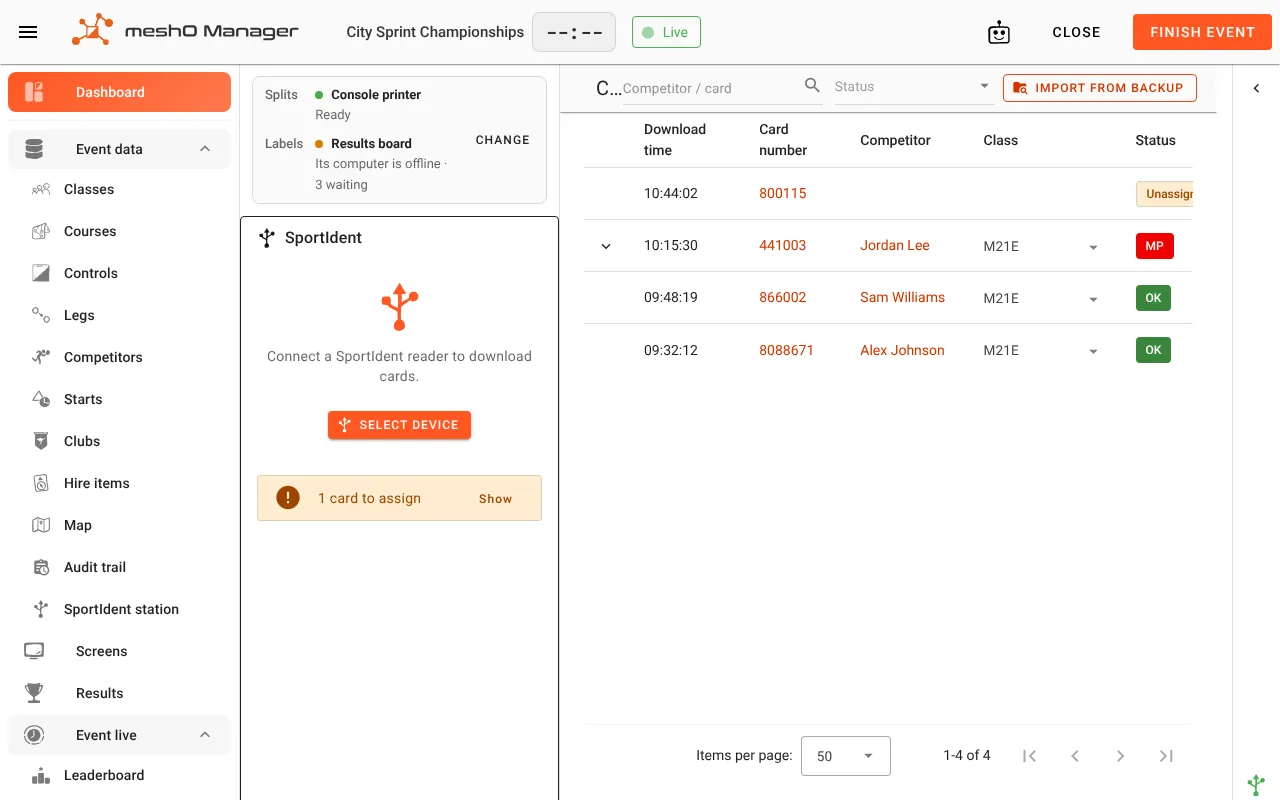
The old menu was a long list: Dashboard, an Event data group of eleven screens, Screens, Results, and an Event live group of seven more that appeared only once the event had started. On a laptop the bottom of it was usually off the screen.
The new menu shows one of three modes at a time, chosen with the switch under Dashboard:
- Course: courses, controls, legs and the map. Radio control placement opens from the map’s page, as before.
- Entries: competitors, classes, clubs, relay teams, starts and hire items.
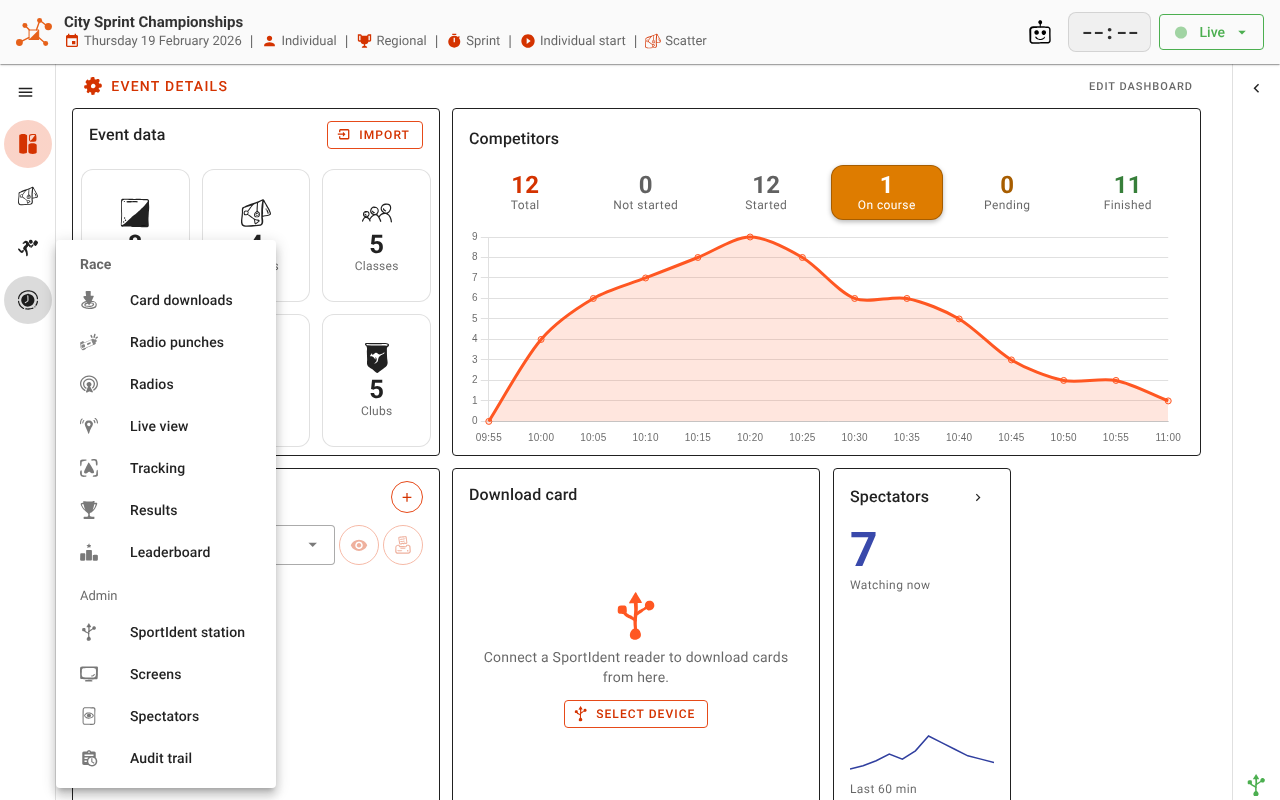
- Race: card downloads, radio punches, radios, live view, tracking, results and the leaderboard. Below them, under Admin: SportIdent station, screens, spectators and the audit trail.
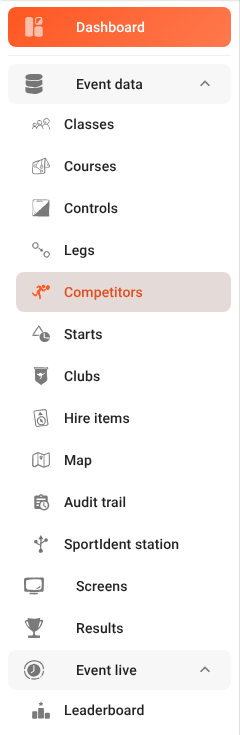
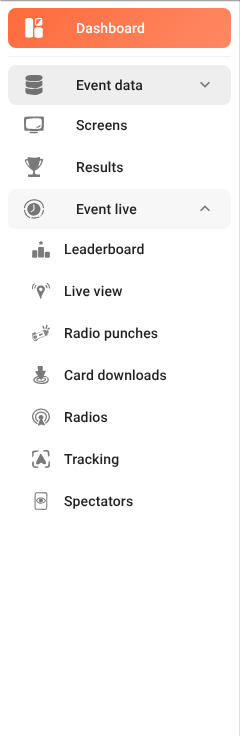
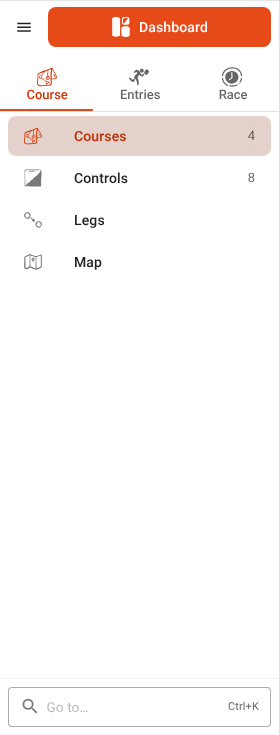
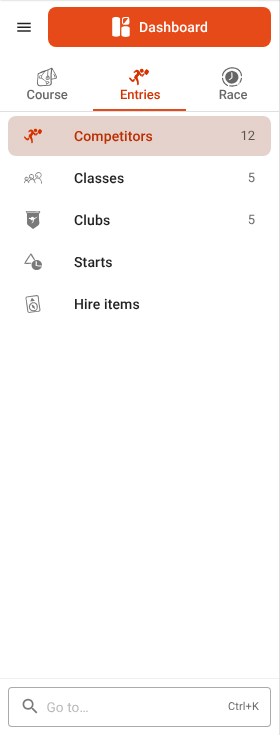
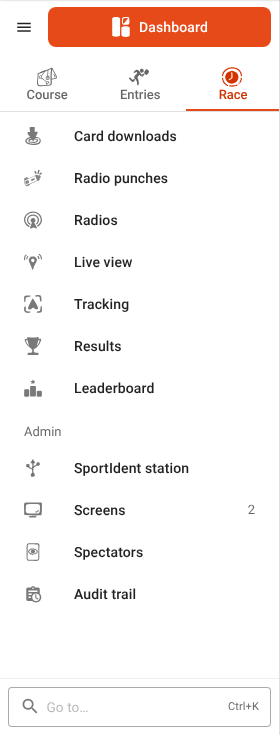
The mode follows the event. An event being set up opens on Entries. Once it is live, and after it finishes, it opens on Race. If you switch mode yourself, your choice holds until the event’s state changes: starting the event moves the menu to Race, because that is what you will want next. Choosing a mode opens its first screen.
Counts show the size of the event. In Course and Entries, each row shows how many of that thing the event has. A zero is shown too: it is something still to set up. In Race, only Screens has a count.
Each screen is in one place. Every screen belongs to exactly one mode. If a screen is not where you expect it, the table at the end of this article lists where each one went, or use Go to….
Go to… finds any screen
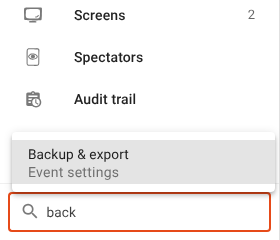
At the foot of the menu is a search box, Go to…. Press Ctrl+K (⌘K on a Mac) from anywhere in an event, type part of a name, and press Enter.
It finds every screen of the event, whichever mode it is in, and every section of the event’s settings, the Event details dialog: type back and Backup & export comes up, and opens the dialog at that section.
Fold the menu to icons
The menu button, now beside Dashboard, folds the menu to a narrow column of four icons: Dashboard, Course, Entries and Race. Click a mode’s icon and its screens open beside the column. Manager remembers whether you folded it, in each browser.
On a window narrower than 1024 pixels, such as a small laptop or a tablet, the menu starts folded.
Every screen opens before the start
Before this release, the whole Event live group, with Card downloads, Radio punches, Radios, Live view, Tracking, the Leaderboard and Spectators, was hidden until the event started. Now every screen opens at any time. Before the start, the race screens say so and what will fill them once the event is live.
This is useful on setup day: you can open Card downloads, connect the SportIdent reader and check where the splits will print before the first runner arrives.
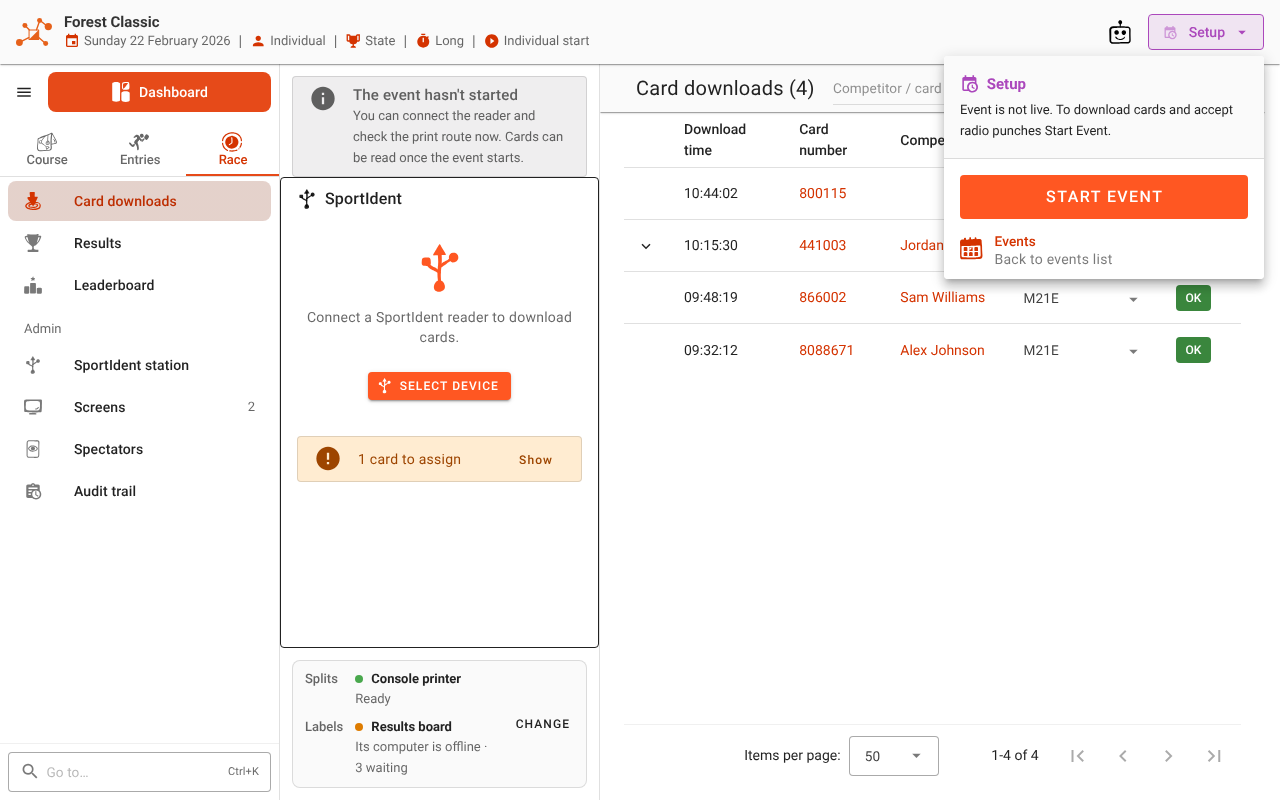
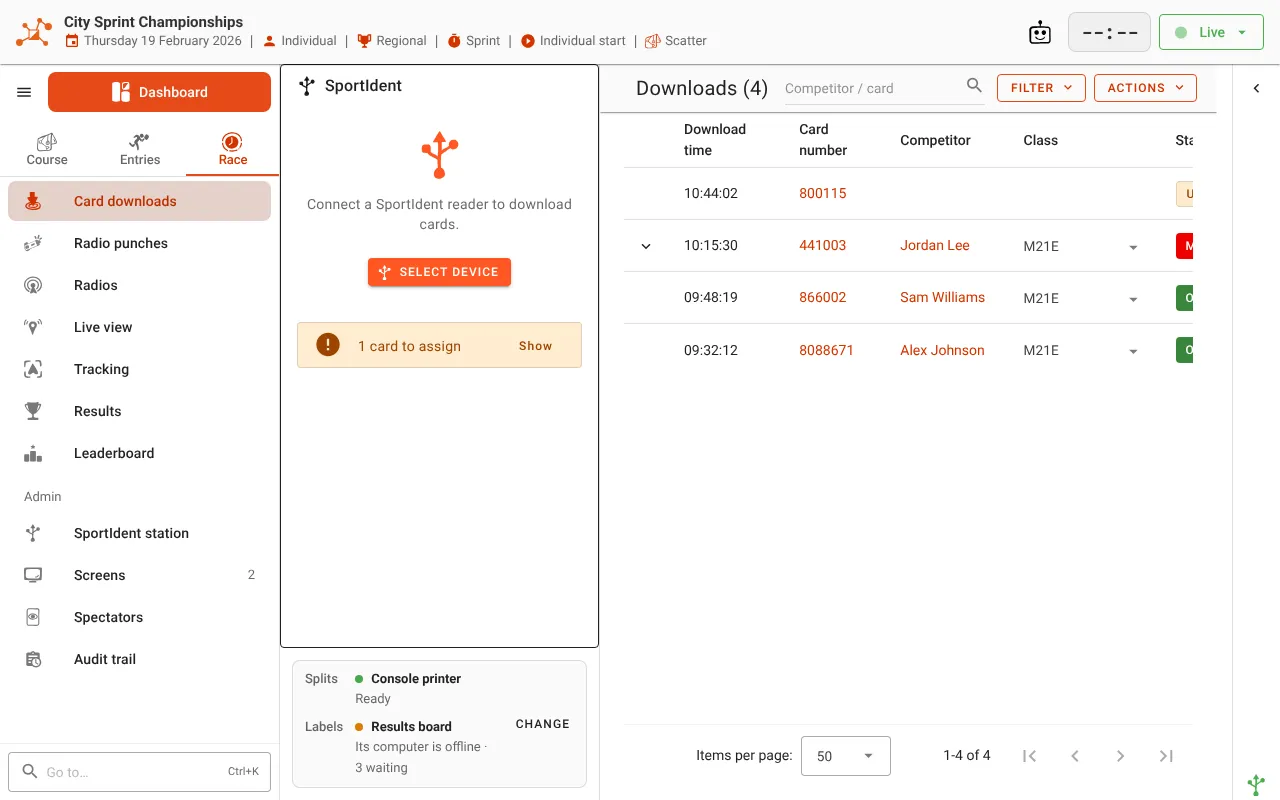
Card downloads has also changed a little. The printing strip, which says where splits and labels will print, has moved from the top of the middle panel to the bottom. Import from backup has moved into an Actions menu.
Where did it go?
| You used to find | It is now |
|---|---|
| Start event, Finish event, Resume event, Replay, Restart event | The state button at the top right, in its menu |
| Close | The state button’s menu → Events |
| Event name, date, type, level, discipline | The top bar, on every page of the event |
| Event details | The dashboard, top left; or Go to… for one section |
| Edit dashboard | The dashboard, top right |
| The menu button (≡) | Inside the menu, beside Dashboard |
| Courses, Controls, Legs, Map | Course |
| Competitors, Classes, Clubs, Starts, Hire items | Entries |
| Card downloads, Radio punches, Radios, Live view, Tracking, Results, Leaderboard | Race |
| SportIdent station, Screens, Spectators, Audit trail | Race, under Admin |
| Import from backup on Card downloads | Card downloads → Actions |
If something is not where this table says, press Ctrl+K and type its name.
The screenshots show sample data. Further reading in the meshO Manager documentation: The dashboard and Your first event. meshO Manager is free to download and use.